Finishing the Goldwing
June 9, 2013


Cosmetically, I was able to add a few touches by grinding
down the raised text from the master cylinder lid and the hydraulic clutch’s
lid and painted both these as well as the top of the throttle housing
copper. I added in a small gear for
looks where the kill switch used to be which I think looks really cool next to
the thumb while riding. This really
helped to clean up the look of the bike, getting away from the Mad Max look a
little bit and leaning more towards a proper steampunk look.

I
tossed around a few ideas about slimming down the front and passenger seats
before finally settling on making this bike a single seater by replacing the
back seat with a glove box mounted on the rear fender. I cut off the back seat entirely and shaved ¾
inch of padding from the front seat to help me sit more into the bike rather
than on top.
I also followed my buddy
Tom’s suggestion and used garage wall spring clips to fasten the single seat to
the frame, which actually does give a little spring to the seat. These two adjustments have made a big
difference in the feel of the ride.

Using an old ammo can, I created this steampunk themed glove
box. I sprayed it with a textured copper
furniture paint on the can body and a few coats of black for the lid and the
clasp followed by rough sanded heavy clear coats to give an aged appearance. After screwing the timing chain and its
associated gears onto the rear, I was able to bolt this can directly into the
frame. This allowed me to cut away the
rear seat base entirely, really cleaning up the appearance of the bike from the
rear.
I drilled holes in the rear fender to prep for the turn
signals I've ordered from Dime City Cycles and I still need to find mounts for
the front turn signals. I also managed to
clean up the interior portion of the false tank assembly by adding the storage
tray and the fuel spill catch basin. I’m
hunting down a 6V regulator to connect the finger swipe switch to the
Lumindisc, which I think will make for a great effect. My next mission is to attach the fuel and
temperature gauges that I just ordered from a seller on Etsy.
 Additionally, I had to replace the 12V
rectifier/regulator after the original went out. This was a little tricky to diagnose at
first, because my symptoms included: bike not starting, turn signals
intermittently blowing fuses and I boiled my battery. After checking my fuel pump and finding that
it was taking fuel in but not pushing it out, I found that the rectifier was
the common bond between the fuel pump relay and the turn signal relay. That’s when it hit me that the rectifier was
blown, which explained why the turn signal fuses would only blow after I tried
starting the bike and it made sense why my battery was boiling.
Additionally, I had to replace the 12V
rectifier/regulator after the original went out. This was a little tricky to diagnose at
first, because my symptoms included: bike not starting, turn signals
intermittently blowing fuses and I boiled my battery. After checking my fuel pump and finding that
it was taking fuel in but not pushing it out, I found that the rectifier was
the common bond between the fuel pump relay and the turn signal relay. That’s when it hit me that the rectifier was
blown, which explained why the turn signal fuses would only blow after I tried
starting the bike and it made sense why my battery was boiling.

 Now that the bike is running again, I have been able to
focus on a few other needed repairs, such as the speedometer and high beam
assembly (which I hope to finish in the next few days). The only work that is
really left after that is cosmetics (pin-striping and decorative gear placement)
and to fix the rear/integrated braking system.
I've also decided to make a few changes to my original plans for the
fuel and temp gauges, but I’ll wait until those are done to post about
them. Here are a few photos of how the
bike is looking right now and I should be posting more soon after the cosmetic
work and the high beam assembly are finished.
Now that the bike is running again, I have been able to
focus on a few other needed repairs, such as the speedometer and high beam
assembly (which I hope to finish in the next few days). The only work that is
really left after that is cosmetics (pin-striping and decorative gear placement)
and to fix the rear/integrated braking system.
I've also decided to make a few changes to my original plans for the
fuel and temp gauges, but I’ll wait until those are done to post about
them. Here are a few photos of how the
bike is looking right now and I should be posting more soon after the cosmetic
work and the high beam assembly are finished.

 A bit more work done this weekend. I was able to finish all of the decorative
gear placement for the cosmetic portion of the project. On the rear fender, I also added a small lion head piece that really pulls everything together for me. I also did wax pencil sketch of the
pinstriping work that I should be accomplishing next weekend. Seeing the bike in these final stages is
getting to be a really good feeling. All
that is left after the pinstriping will be to fix the rear brake issue, attach
the finger swipe switch to the Lumindisc (which I realized will not require a
regulator as I was guessing) and to attach some sort of a fuel readout.
A bit more work done this weekend. I was able to finish all of the decorative
gear placement for the cosmetic portion of the project. On the rear fender, I also added a small lion head piece that really pulls everything together for me. I also did wax pencil sketch of the
pinstriping work that I should be accomplishing next weekend. Seeing the bike in these final stages is
getting to be a really good feeling. All
that is left after the pinstriping will be to fix the rear brake issue, attach
the finger swipe switch to the Lumindisc (which I realized will not require a
regulator as I was guessing) and to attach some sort of a fuel readout.
 The big part that I’ve been working on has been the high
beam assembly and headlight switch. I
built the box from sheet aluminum and put it together using JB Weld so that I
wouldn’t disturb any of the electronics in the copper high beam tubes. However, once I finally got everything put
together, I’m getting a very weak signal, not enough to power the LEDs. So, aside from the pinstriping, I will be
doing a bit of electronics investigation.
I’m hoping that the problem takes place in wiring within the bike and
not in the high beam box assembly.
Fingers crossed.
The big part that I’ve been working on has been the high
beam assembly and headlight switch. I
built the box from sheet aluminum and put it together using JB Weld so that I
wouldn’t disturb any of the electronics in the copper high beam tubes. However, once I finally got everything put
together, I’m getting a very weak signal, not enough to power the LEDs. So, aside from the pinstriping, I will be
doing a bit of electronics investigation.
I’m hoping that the problem takes place in wiring within the bike and
not in the high beam box assembly.
Fingers crossed.
 Over the course of this past weekend, I managed to
completely finish the cosmetics of the Goldwing, something I am very happy
about. Included are a couple of pictures of
the pinstriping job that I did. When I
initially finished the striping, it looked like the old time machine/steampunk
machine I was hoping for, but with a brand new stripe job, which I was not
happy about. So, I took some mineral
spirits and scrubbed at various parts of the pinstriping job that would
eventually see a lot of wear, and then speckled it over with flat black spray
paint. This properly aged the stripe job
(in my mind at least) so that it looked like it was painted upon its build
date, in 1896 or thereabouts.
Over the course of this past weekend, I managed to
completely finish the cosmetics of the Goldwing, something I am very happy
about. Included are a couple of pictures of
the pinstriping job that I did. When I
initially finished the striping, it looked like the old time machine/steampunk
machine I was hoping for, but with a brand new stripe job, which I was not
happy about. So, I took some mineral
spirits and scrubbed at various parts of the pinstriping job that would
eventually see a lot of wear, and then speckled it over with flat black spray
paint. This properly aged the stripe job
(in my mind at least) so that it looked like it was painted upon its build
date, in 1896 or thereabouts.

After I finally got the high beams I built working properly, it dawned on me that I didn't think it was doing the bike any favors in terms of aesthetics. I decided to remove them entirely and hook up the headlights built in high beam; I’ll be saving the copper tube high beams for another project. So, I finally got the bike looking right, and all I need to do now is fix the integrated brake (rear and right front), possibly add a sight glass for the fuel and hook up the finger swipe switch to the Lumindisc. Or so I thought. Right as I was pulling the bike back into the garage, the sight glass on my hand brake’s master cylinder decided it had a good long life and gave out. So, now I have no brakes at all, giving items to order on eBay and a little more time working in the garage.

 Well, I haven’t written in quite some time, but I also haven’t been doing much work on the Goldwing, so there’s been very little to write about. I did replace both the front and rear master cylinders replaced all the brake lines with braided steel. I also managed to take the bike around for a few days over the summer, but it was short lived. One fine day on the way home from work, the fuel pump sprung a savage leak and started spitting gas all over my leg. I've just finally replaced the fuel pump after finally finding one for under $40 on eBay. I also started having problems with the secondhand rear master cylinder that I used as a replacement. It also doesn't want to hold its respective fluid, but that is a repair I have yet to tackle.
 In the meantime, I bought a Biltwell Gringo helmet and found plans for building a really cool face shield at this site here, and I got to work right away on what it simply a first draft attempt. I purchased a sheet of lexan and everything else at Lowe’s for under $30. The lexan was surprisingly easy to work with. I was able to cut out the face shield with a score and crack method followed a decent amount of vigorous sanding. Strapping the face shield into place, I used a heat gun to shape it to the helmet. Overall, I don’t think it turned out too bad, but I know that I make it a bit cleaner the second time around. That’s my plan for this weekend, hopefully I’ll be in touch soon.

December 29, 2013
Well, after a lot of time away and working on other
projects, I've finally gotten back to the Goldwing. All turn signals have been attached; I used
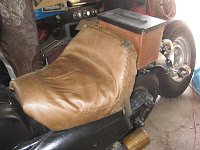
pipe clamps and rubber gaskets for the front ones. I sewed the leather onto the seat, using a
thick lace to give it more of a raw look and added a few steampunk buttons for
flare as well as to cover the start/stop stitch area.
 Additionally, I had to replace the 12V
rectifier/regulator after the original went out. This was a little tricky to diagnose at
first, because my symptoms included: bike not starting, turn signals
intermittently blowing fuses and I boiled my battery. After checking my fuel pump and finding that
it was taking fuel in but not pushing it out, I found that the rectifier was
the common bond between the fuel pump relay and the turn signal relay. That’s when it hit me that the rectifier was
blown, which explained why the turn signal fuses would only blow after I tried
starting the bike and it made sense why my battery was boiling.
Additionally, I had to replace the 12V
rectifier/regulator after the original went out. This was a little tricky to diagnose at
first, because my symptoms included: bike not starting, turn signals
intermittently blowing fuses and I boiled my battery. After checking my fuel pump and finding that
it was taking fuel in but not pushing it out, I found that the rectifier was
the common bond between the fuel pump relay and the turn signal relay. That’s when it hit me that the rectifier was
blown, which explained why the turn signal fuses would only blow after I tried
starting the bike and it made sense why my battery was boiling.
 Now that the bike is running again, I have been able to
focus on a few other needed repairs, such as the speedometer and high beam
assembly (which I hope to finish in the next few days). The only work that is
really left after that is cosmetics (pin-striping and decorative gear placement)
and to fix the rear/integrated braking system.
I've also decided to make a few changes to my original plans for the
fuel and temp gauges, but I’ll wait until those are done to post about
them. Here are a few photos of how the
bike is looking right now and I should be posting more soon after the cosmetic
work and the high beam assembly are finished.
Now that the bike is running again, I have been able to
focus on a few other needed repairs, such as the speedometer and high beam
assembly (which I hope to finish in the next few days). The only work that is
really left after that is cosmetics (pin-striping and decorative gear placement)
and to fix the rear/integrated braking system.
I've also decided to make a few changes to my original plans for the
fuel and temp gauges, but I’ll wait until those are done to post about
them. Here are a few photos of how the
bike is looking right now and I should be posting more soon after the cosmetic
work and the high beam assembly are finished.
January 5, 2014
A bit more work done this weekend. I was able to finish all of the decorative
gear placement for the cosmetic portion of the project. On the rear fender, I also added a small lion head piece that really pulls everything together for me. I also did wax pencil sketch of the
pinstriping work that I should be accomplishing next weekend. Seeing the bike in these final stages is
getting to be a really good feeling. All
that is left after the pinstriping will be to fix the rear brake issue, attach
the finger swipe switch to the Lumindisc (which I realized will not require a
regulator as I was guessing) and to attach some sort of a fuel readout. The big part that I’ve been working on has been the high
beam assembly and headlight switch. I
built the box from sheet aluminum and put it together using JB Weld so that I
wouldn’t disturb any of the electronics in the copper high beam tubes. However, once I finally got everything put
together, I’m getting a very weak signal, not enough to power the LEDs. So, aside from the pinstriping, I will be
doing a bit of electronics investigation.
I’m hoping that the problem takes place in wiring within the bike and
not in the high beam box assembly.
Fingers crossed.
January 13, 2014


After I finally got the high beams I built working properly, it dawned on me that I didn't think it was doing the bike any favors in terms of aesthetics. I decided to remove them entirely and hook up the headlights built in high beam; I’ll be saving the copper tube high beams for another project. So, I finally got the bike looking right, and all I need to do now is fix the integrated brake (rear and right front), possibly add a sight glass for the fuel and hook up the finger swipe switch to the Lumindisc. Or so I thought. Right as I was pulling the bike back into the garage, the sight glass on my hand brake’s master cylinder decided it had a good long life and gave out. So, now I have no brakes at all, giving items to order on eBay and a little more time working in the garage.
November 24, 2014
Well, I haven’t written in quite some time, but I also haven’t been doing much work on the Goldwing, so there’s been very little to write about. I did replace both the front and rear master cylinders replaced all the brake lines with braided steel. I also managed to take the bike around for a few days over the summer, but it was short lived. One fine day on the way home from work, the fuel pump sprung a savage leak and started spitting gas all over my leg. I've just finally replaced the fuel pump after finally finding one for under $40 on eBay. I also started having problems with the secondhand rear master cylinder that I used as a replacement. It also doesn't want to hold its respective fluid, but that is a repair I have yet to tackle.In the meantime, I bought a Biltwell Gringo helmet and found plans for building a really cool face shield at this site here, and I got to work right away on what it simply a first draft attempt. I purchased a sheet of lexan and everything else at Lowe’s for under $30. The lexan was surprisingly easy to work with. I was able to cut out the face shield with a score and crack method followed a decent amount of vigorous sanding. Strapping the face shield into place, I used a heat gun to shape it to the helmet. Overall, I don’t think it turned out too bad, but I know that I make it a bit cleaner the second time around. That’s my plan for this weekend, hopefully I’ll be in touch soon.

Comments
Post a Comment